Here is your step-by-step guide to get you started.
With Xero and QuickFee integrated, you can save time and take care of all your accounting needs in one place. Get setup now and start winning more business and reducing debtor days.
Step 1
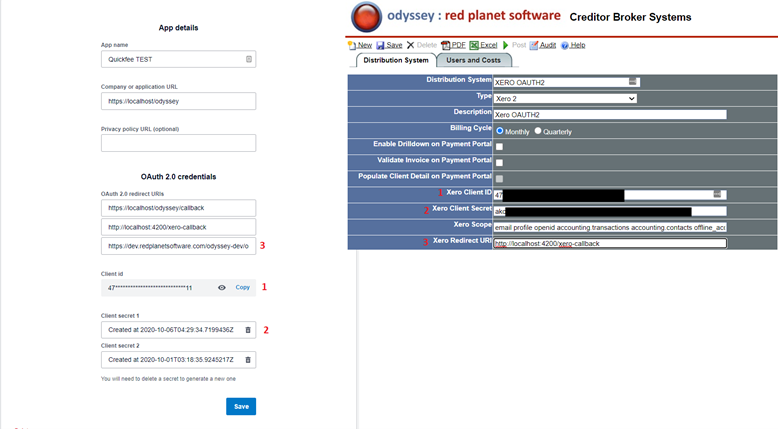
In Red Planet Odyssey Creditor Broker System, create a new entry for Type ‘Xero 2’. Fill in the details according to the Xero App settings as per below
Enable drilldown on Payment Portal, Validate Invoice on Payment Portal and Populate Client Detail on Payment Portal will still the same as previous Xero functionality.
The redirect URI and Client Secret can be either one from the Xero App if there are several created for different purpose.
Meanwhile for “Xero Scope”, we are using minimum set of scope required to be able to read invoice and the contact*: email profile openid accounting.transactions accounting.contacts offline_access
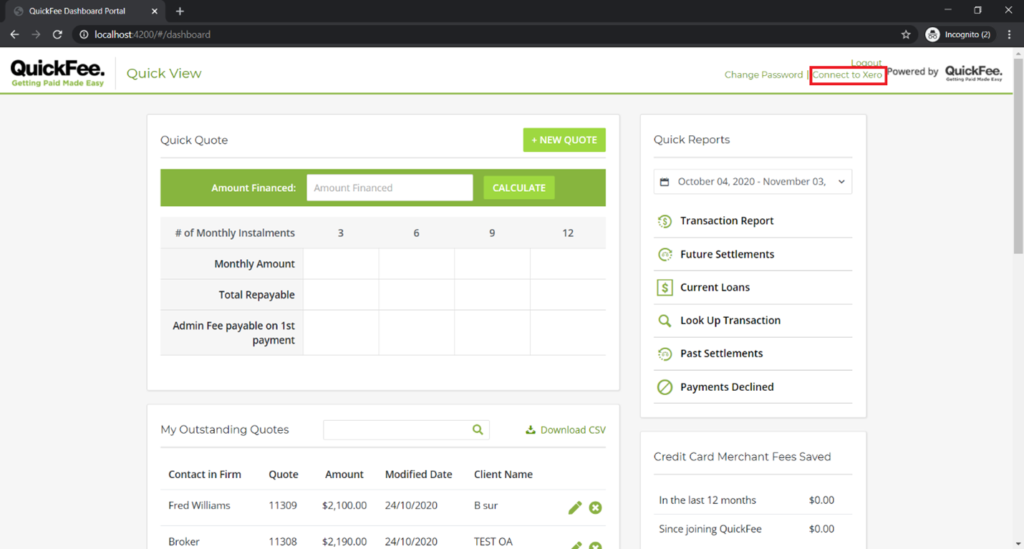
After Xero OAUTH2 settings above is saved, broker user that wants to integrate his/her broker/firm with Xero will need to login into Quickfee Portal.
"Connect to Xero” link will appear on top right menu, just next to the ‘Change Password’ link. If the broker has never connected to Xero or existing connect token has expired, the link will appear for the user as long as the Creditor Broker System has been set as per step 1.
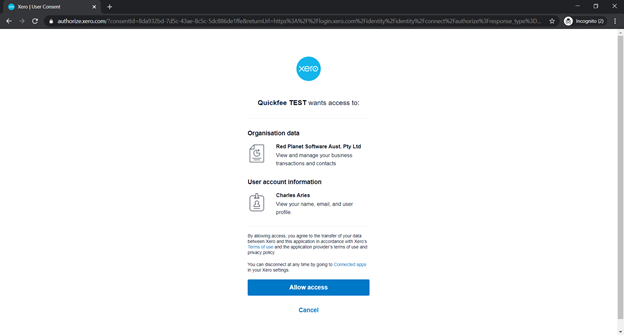
Clicking “Allow access” will then takes the user back to Quickfee Portal where the authorization token will be processed and stored in the system. This will be used in QSOP to read the Xero invoice and client details.
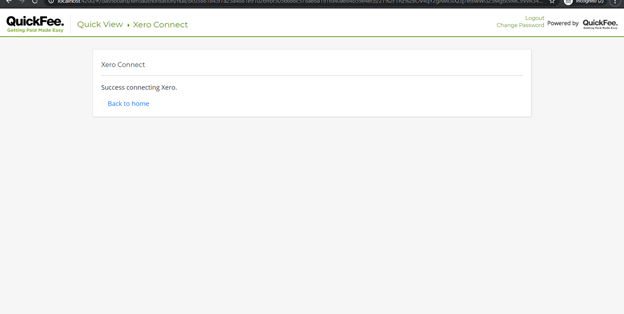
Step 4
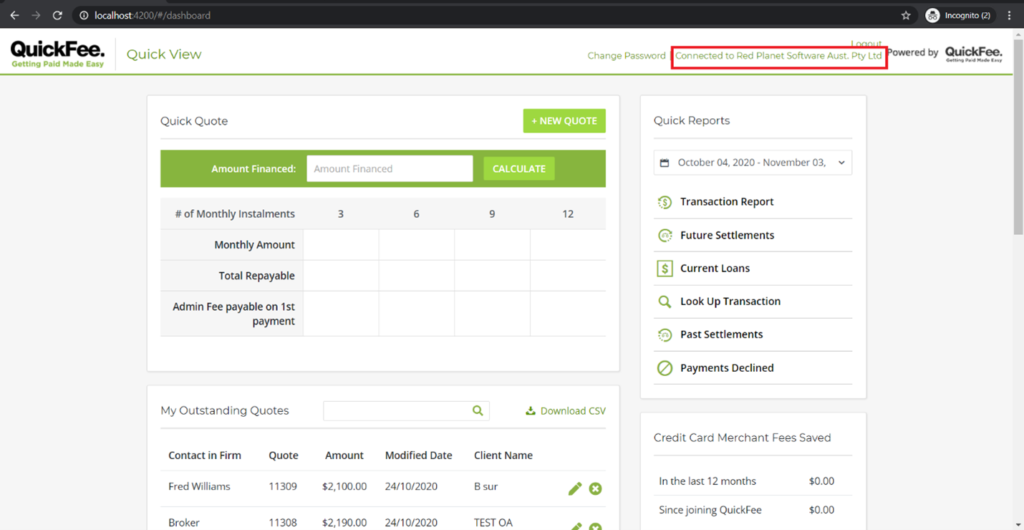
Once done as above, the user can either back to home, logout or close the browser as the connection has been successfully established and the connection token is stored in the system. Clicking back to home will then show that the company it is already connected to.
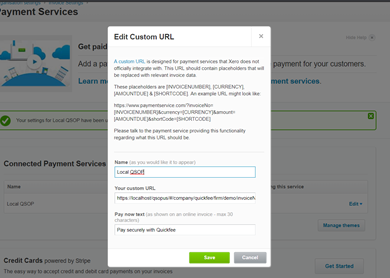
Step 5
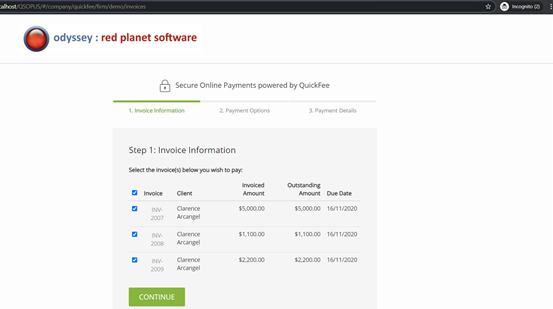
This is the setup that the firm needs to do in their own Xero account to be able to pay via QSOP.
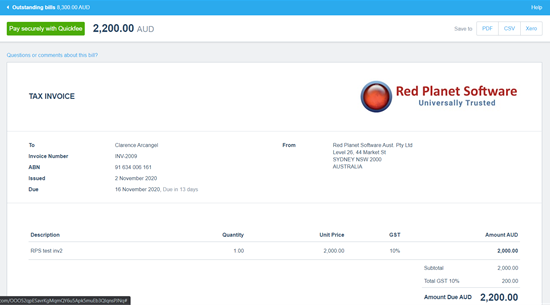
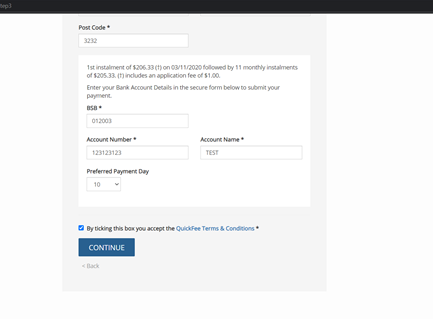
Select the invoice to be paid and processed and then click ‘Continue’ and fill in the required details on the next screen, including the payment details.
Step 9
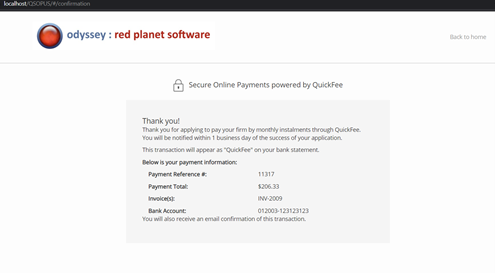
Accept the terms and conditions by ticking the checkbox and click ‘Continue’ to submit the payment for the selected invoice(s).